Have you ever wondered about the best way to incubate and hatch duck eggs? Well, look no further! In this article, we will explore the various methods available for this delicate process. Whether you’re a seasoned farmer or a curious hobbyist, we’ve got you covered. So, read on to discover the secrets of successfully hatching adorable ducklings!

Choosing the Right Incubator
Understanding the Different Types of Incubators
When it comes to incubating duck eggs, choosing the right incubator is crucial. There are various types of incubators available, each with its own set of features and capabilities. Some common types include still-air incubators, forced-air incubators, and cabinet incubators. Still-air incubators rely on natural air circulation, while forced-air incubators use fans to evenly distribute heat. Cabinet incubators are larger and can accommodate a higher number of eggs. Understanding the differences between these types will help you make an informed decision about which incubator is best suited for your needs.
Considering the Size and Capacity of the Incubator
The size and capacity of the incubator are important factors to consider. The size should be adequate to accommodate the number of duck eggs you plan to hatch. Make sure to choose an incubator that is large enough to provide sufficient space for the eggs to hatch comfortably. Additionally, consider the capacity of the incubator, as some models can hold a greater number of eggs than others. This will give you the flexibility to scale your hatchery operation if desired.
Evaluating the Temperature and Humidity Control
Temperature and humidity control are crucial for successful egg incubation. Different types of duck eggs require specific temperature and humidity levels. It is essential to choose an incubator that offers precise temperature and humidity control to meet the needs of your specific duck egg breed. Look for an incubator with adjustable settings and reliable monitoring systems to ensure consistent conditions throughout the incubation process.
Analyzing the Egg Turning Mechanism
Egg turning is an essential aspect of incubating duck eggs, as it helps prevent the embryos from sticking to the inner membrane of the eggshell. When choosing an incubator, consider the type of egg turning mechanism it offers. Some incubators feature an automatic turning system that gently rotates the eggs at regular intervals. Others may require manual turning, which involves turning the eggs by hand. Automatic turning mechanisms can be more convenient and reduce the risk of human error, but manual turning can also be effective if done correctly.
Preparing the Duck Eggs
Selecting Fertile and Healthy Eggs
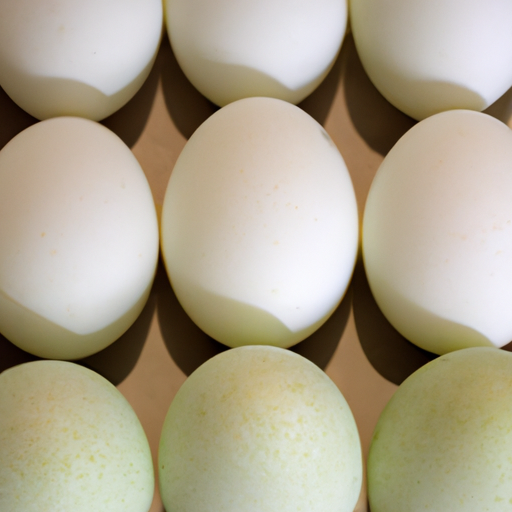
Before starting the incubation process, it is important to select fertile and healthy duck eggs. Look for eggs that are clean, normal-sized, and free from cracks or deformities. You can determine if an egg is fertile by examining the shell for a bullseye pattern when it is illuminated during candling (more on this later). Avoid using eggs that are excessively dirty or have abnormalities, as they may have a lower chance of successful hatching.
Storing the Eggs before Incubation
Once you’ve selected the eggs, it’s essential to store them properly before placing them in the incubator. Store the eggs in a cool and dry place, ideally at a temperature between 50 to 60 degrees Fahrenheit. It is important to store the eggs with the pointed end facing downwards to prevent the air cell from shifting. Avoid storing the eggs for more than one week before starting the incubation process, as the viability of the eggs may decrease over time.
Candling the Eggs to Check for Viability
Candling is a process that involves shining a bright light through the egg to assess its viability. It can help you identify whether the eggs are fertile and developing properly. To candle the eggs, darken the room, hold the egg against the light source, and observe the contents inside. A fertile egg will display a network of blood vessels and a developing embryo, usually visible as a dark spot or mass. Remove any eggs that appear clear or do not show signs of development during candling.
Cleaning and Disinfecting the Eggs
Before placing the eggs in the incubator, it’s important to clean and disinfect them to minimize the risk of bacterial contamination. Use a soft cloth or brush to gently remove any dirt or debris from the eggshell. Avoid using water or any liquid disinfectant, as it may remove the protective coating on the shell. Instead, use a dry disinfectant specifically formulated for eggs, following the manufacturer’s instructions. This will help ensure that the eggs remain in a clean and hygienic environment throughout the incubation process.

Setting Up the Incubator
Creating a Suitable Environment
Before setting up the incubator, create a suitable environment for optimal incubation conditions. Choose a location that is safe, stable, and away from direct sunlight or drafts. Ensure that the room temperature remains relatively constant to avoid sudden temperature fluctuations. It is also essential to maintain a clean and dust-free environment to prevent any contaminants from affecting the hatch rate.
Positioning the Incubator for Stability
Proper positioning of the incubator is crucial for stability and even heat distribution. Place the incubator on a level surface to prevent any wobbling or tilting. Avoid placing it near doors or windows where drafts may compromise the temperature control. Ensure that the incubator is positioned in a well-ventilated area to allow for adequate airflow.
Setting the Ideal Temperature and Humidity Levels
Maintaining the ideal temperature and humidity levels is vital for successful incubation. The temperature and humidity requirements may vary depending on the breed of duck eggs you are incubating. Generally, the temperature should be set between 99 to 101 degrees Fahrenheit, with a humidity level of around 55 to 65 percent. Refer to specific guidelines for your duck egg breed to ensure you are providing the optimal conditions for successful hatching.
Placing a Thermometer and Hygrometer inside the Incubator
To monitor the temperature and humidity accurately, place a reliable thermometer and hygrometer inside the incubator. These devices will help you gauge the actual conditions inside the incubator and make any necessary adjustments. Regularly check the readings and make any required modifications to maintain a stable environment throughout the incubation process.
Incubation Process
Loading the Eggs into the Incubator
Once the incubator is set up and the temperature and humidity levels are properly adjusted, carefully load the duck eggs into the incubator. Place the eggs on their sides, making sure there is enough space between them for proper airflow. Avoid overcrowding the eggs, as this can interfere with the heat distribution and affect the hatch rate. Take note of the incubation date for each batch of eggs, as it will help you track the incubation period accurately.
Turning the Eggs Regularly
During incubation, it is important to regularly turn the eggs to ensure equal exposure of the developing embryos to heat and oxygen. If your incubator has an automatic egg turning mechanism, ensure that it is functioning properly and set it to rotate the eggs regularly. If you are manually turning the eggs, mark each egg with an “X” on one side and an “O” on the other to keep track of their rotation. Turn the eggs at least three times a day, making sure to rotate them gently to avoid any harm to the developing embryos.
Monitoring and Adjusting Temperature and Humidity
Throughout the incubation process, closely monitor the temperature and humidity levels inside the incubator. Use the thermometer and hygrometer to check the readings regularly. If the temperature or humidity deviates from the desired range, make the necessary adjustments to maintain a stable environment. Be cautious not to make sudden or drastic changes, as this can stress the developing embryos. Gradual and subtle adjustments are usually recommended to ensure the health and viability of the duck eggs.
Maintaining Proper Ventilation
Proper ventilation is essential for the health and development of the embryos. The exchange of oxygen and carbon dioxide is vital in the incubation process. Ensure that the incubator has adequate ventilation to allow fresh air to circulate while removing any excess carbon dioxide. However, be mindful of maintaining a stable temperature and humidity level while providing sufficient airflow. Avoid opening the incubator unnecessarily during the incubation process, as this can disrupt the temperature and humidity balance.

Candling and Egg Development
Understanding the Importance of Candling
Candling plays a crucial role in monitoring the development of the duck embryos inside the eggs. Regularly candling the eggs allows you to assess the progress of the embryos and identify any issues or abnormalities early on. It also helps in determining the viability of the eggs and whether they should continue to be incubated or be discarded.
Performing Candling to Monitor Development
To perform candling, darken the room and place a bright light source beneath the egg. Gently hold the egg against the light and observe the contents. As the incubation period progresses, you should be able to see the growth of blood vessels, the shape of the developing embryo, and, in some cases, the movement of the duckling inside. Candling should be done at regular intervals, such as once a week, to monitor the progress of the embryos.
Identifying Fertile and Non-Fertile Eggs
Candling also helps in distinguishing between fertile and non-fertile eggs. Fertile eggs will show signs of development, such as blood vessels and a growing embryo, whereas non-fertile eggs will appear clear with no signs of growth. Identifying non-fertile eggs allows you to remove them from the incubator, reducing the risk of contamination or wasted incubation space.
Discarding Non-Viable Eggs
During candling, you may come across eggs that show signs of abnormal development or lack of progress. These eggs may have stopped developing or have deformities that make it unlikely for the duckling to successfully hatch. It’s important to remove such non-viable eggs from the incubator to prevent any potential harm to the other developing embryos. Make sure to dispose of the non-viable eggs properly and maintain a clean incubator environment.
Assisting with Hatching
Knowing when to Assist the Ducklings
While the majority of ducklings will hatch on their own without any assistance, there may be instances where intervention is necessary. It’s important to know when and how to assist the ducklings during the hatching process. Signs that a duckling may need assistance include prolonged pipping without progress, visible distress or exhaustion, or being unable to break through the shell after a prolonged period. If you notice any of these signs, it may be appropriate to carefully intervene to help the duckling hatch.
Creating a Safe Hatchery Area
When assisting with hatching, it is vital to create a safe environment for the ducklings. Prepare a separate area, such as a small box or tub, lined with a soft bedding material. This will provide the ducklings with a secure and cozy space to rest and dry after hatching. Ensure that the area is warm, draft-free, and well-ventilated to maintain optimal conditions for the newly hatched ducklings.
Providing Optimal Conditions for Hatching
To assist with the hatching process, you can create optimal conditions within the incubator. Increase the humidity level slightly by adding a small water container or wetting a sponge to provide moisture. This helps soften the eggshells and facilitates easier hatching. Be mindful of not saturating the incubator with excess moisture, as this can create a damp and unhealthy environment.
Assisting with the Hatching Process if Necessary
If a duckling requires assistance during the hatching process, it’s important to proceed with caution. Gently chip away small pieces of the shell, being careful not to disturb the membrane or injure the duckling. The duckling should be able to free itself from the shell gradually. Avoid pulling or forcing the duckling out, as this can cause harm. Allow the duckling to emerge at its own pace, offering support if needed.

Hatchlings’ Care and Brooding
Preparing a Brooder for the Newly Hatched Ducklings
After the ducklings have successfully hatched, it is crucial to provide them with a suitable brooder area. A brooder is a designated space where the ducklings can be cared for and raised during their early stages of life. Prepare a brooder box or area with proper bedding, such as wood shavings or straw, to provide comfort and warmth. It should be spacious enough to accommodate the growing ducklings and allow for easy movement.
Maintaining Optimal Temperature and Humidity in the Brooder
Maintaining the right temperature and humidity levels in the brooder is essential for the well-being of the ducklings. Initially, set the temperature between 85 to 90 degrees Fahrenheit, gradually reducing it by approximately five degrees per week as the ducklings grow and develop their feathers. Monitor the temperature closely, ensuring that it remains within the recommended range. Maintain a humidity level of around 50 to 60 percent to prevent dehydration.
Providing Adequate Space and Lighting
As the ducklings grow, they will require more space to move around and explore. Provide enough space in the brooder for the ducklings to exercise and socialize comfortably. It is also important to provide sufficient lighting to mimic natural daylight. Use a heat lamp or other suitable lighting sources to ensure that the brooder is well-lit throughout the day and night.
Feeding and Watering the Hatchlings
Proper nutrition is crucial for the healthy growth and development of the ducklings. Feed them a commercial duckling starter feed that is specifically formulated for their nutritional requirements. Ensure a constant supply of fresh, clean drinking water, making it easily accessible for the ducklings at all times. Offer water in shallow dishes or waterers that are safe and shallow enough to prevent drowning hazards.
Addressing Common Issues
Dealing with Slow or No Hatch Rates
In some cases, you may encounter slow or no hatch rates despite your best efforts. Several factors can contribute to this issue, including improper incubation temperatures, humidity fluctuations, or low egg fertility rates. If you experience slow or no hatch rates, it is important to evaluate your incubation process, make any necessary adjustments, and seek guidance from experienced breeders or professionals for further assistance.
Managing Abnormal Development or Deformities
Abnormal development or deformities in duck embryos can occur during incubation. These abnormalities can range from malpositions to structural defects. It is important to closely monitor the development of the ducklings during candling and identify any signs of abnormality early on. If you encounter abnormal development or deformities, consult with a veterinarian or experienced poultry specialist for guidance on how to manage the situation.
Resolving Hatching Difficulties and Stuck Ducklings
Occasionally, ducklings may experience difficulties or become stuck during the hatching process. In such situations, it is important to act swiftly and cautiously to ensure the safety and well-being of the ducklings. Gently moisten the area around the stuck duckling with warm water to soften the shell and membrane. Carefully peel away small pieces of the shell, being mindful not to damage the duckling or disturb the membrane. If you encounter any difficulties or signs of distress, seek professional help immediately.
Addressing Health Issues in the Hatchlings
During the brooding period, it is crucial to closely monitor the health of the ducklings and address any health issues promptly. Watch for signs of illness, such as lethargy, loss of appetite, or abnormal behavior. Maintain a clean brooder area, regularly clean the bedding, and provide a suitable and hygienic environment. If you notice any health concerns, consult with a veterinarian who specializes in poultry to ensure appropriate diagnosis and treatment.
Final Stages and Moving the Ducklings
Allowing Proper Drying and Resting Time after Hatching
After hatching, it is important to allow the ducklings proper drying and resting time before moving them to the brooder. The ducklings will naturally fluff up their down feathers and dry after hatching. This process may take several hours. Avoid rushing the ducklings and give them sufficient time to recover and adjust to their new environment.
Moving the Ducklings to a Brooder or Duck House
Once the ducklings have dried and rested, carefully move them to the brooder or a suitable duck house. Gently handle the ducklings to minimize stress and avoid injury. Ensure that the brooder or duck house is prepared with appropriate bedding, a heat source, water, and food. Gradually introduce the ducklings to their new surroundings, providing a smooth transition from the incubator to the brooder or duck house.
Providing Suitable Brooder Conditions
Once the ducklings are in the brooder, continue to maintain optimal temperature and humidity levels. Adjust the temperature gradually as they grow and develop. Provide adequate space, lighting, and ventilation to support their physical and social needs. Monitor the ducklings closely, observing their behavior and health, and make any necessary adjustments to ensure their well-being.
Monitoring the Ducklings’ Growth and Development
Throughout the rearing process, it is important to monitor the growth and development of the ducklings. Observe their appetite, activity levels, and overall health. Ensure they are growing at a steady rate and displaying normal behavior. Offer appropriate feed for their age and adjust their diet as they mature. Regularly weigh the ducklings to track their growth progress and ensure they are receiving adequate nutrition.
Conclusion and Best Practices
Reviewing the Key Factors for Successful Duck Egg Incubation
Incubating and hatching duck eggs can be an exciting and rewarding experience. To achieve successful results, consider key factors such as choosing the right incubator, selecting fertile and healthy eggs, maintaining optimal temperature and humidity, and providing appropriate care throughout the incubation process. By following best practices and dedicating time and attention to each stage, you can increase the chances of a successful hatch and the growth of healthy ducklings.
Understanding the Importance of Patience and Care
Incubating and hatching duck eggs requires patience and care. It is a delicate process that demands careful attention to detail. From properly selecting the eggs to monitoring the temperature and humidity levels, every step plays a crucial role in the successful development and hatching of the ducklings. Embrace the journey and approach it with a mindset of patience and care.
Seeking Professional Advice if Needed
If you are new to incubating and hatching duck eggs or encounter any challenges along the way, don’t hesitate to seek professional advice. Consult with experienced breeders, veterinarians, or poultry specialists who can provide guidance and support. They can offer valuable insights, troubleshoot issues, and help ensure the best possible outcome for your duck egg incubation project.
Enjoying the Rewarding Experience of Hatching Duck Eggs
Lastly, remember to enjoy the rewarding experience of hatching duck eggs. Witnessing the development of ducklings from eggs to adorable, fluffy hatchlings is a truly magical and memorable journey. Embrace the joy and wonder of the process, and take pride in your efforts to create a nurturing environment for new life.