Do you dream of raising your own chickens but don’t have the space for a permanent coop? Look no further – in this article, we will show you how to build your very own DIY chicken tractor for pastured poultry. A chicken tractor is a portable coop that allows your chickens to graze on fresh grass while providing them with shelter and protection. With our easy-to-follow steps and affordable materials, you’ll be on your way to enjoying the benefits of backyard chickens in no time!

Choosing the Right Design
Determining the Size of the Tractor
When building a DIY chicken tractor, it’s essential to consider the size of the tractor that will best meet your needs. The size of the tractor will depend on several factors, including the number of chickens you plan to house and the available space in your yard. Adequate space is crucial to ensure that your chickens have sufficient room to roam and forage.
Considering Mobility and Portability
Another important factor to consider when choosing a design is the tractor’s mobility and portability. A chicken tractor allows your chickens to graze freely while still protecting them from predators. Opt for a design that is lightweight and easy to move around your yard. This mobility will enable you to regularly relocate the tractor, ensuring that your chickens have access to fresh areas to forage.
Evaluating Materials and Tools
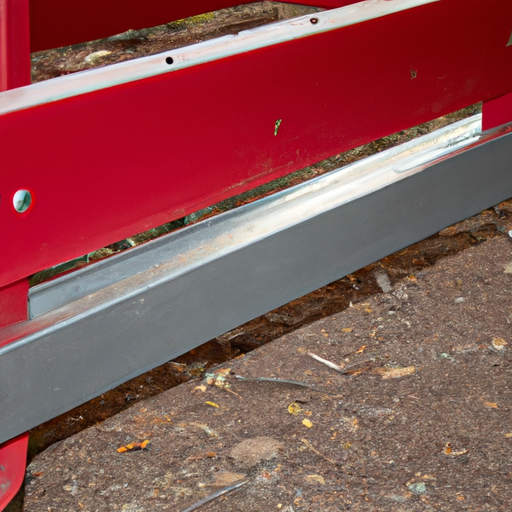
As you plan to build your DIY chicken tractor, it is crucial to evaluate the materials and tools you will need. Consider using sturdy materials such as pressure-treated wood or PVC pipes for the frame. Additionally, ensure you have all the necessary tools, such as a saw, hammer, drill, and measuring tape, to complete the construction successfully. Choosing the right materials and tools will contribute to the durability and functionality of your chicken tractor.
Preparing the Area
Selecting the Site
Before constructing your chicken tractor, carefully select a suitable site in your yard. Choose an area that provides adequate sunlight to allow your chickens to bask and forage naturally. The site should also have access to fresh water and be easily accessible for feeding and maintenance. Take into account any potential hazards or obstacles that may need to be removed or addressed before construction begins.
Clearing Grass and Weeds
To ensure a clean and safe environment for your chickens, it is essential to clear the area of grass and weeds where the tractor will be located. Remove any vegetation that may pose a threat to the health and safety of your chickens. This step is crucial in preventing pests, such as ticks and fleas, and providing a clean space for your chickens to roam.
Ensuring Security and Protection
When preparing the area for your chicken tractor, it is vital to consider security and protection. Assess the site for potential threats, such as nearby predators or areas where your chickens could escape. Install fences or use landscaping features to create a secure perimeter that prevents predators from accessing your chickens. Ensuring the safety of your chickens will promote a stress-free and productive environment.

Constructing the Frame
Building the Base Frame
Start constructing your chicken tractor by building the base frame. This frame will provide stability and support to the entire structure. Using the selected materials and tools, assemble the base frame according to your chosen design plan. It is crucial to double-check the measurements and ensure that the frame is level and sturdy. A strong and well-built base frame will contribute to the overall durability and longevity of your chicken tractor.
Adding Support Beams
To provide additional support and strength to the frame, add support beams. These beams will help distribute the weight evenly and prevent sagging or collapsing of the chicken tractor. Secure the support beams to the base frame, ensuring they are properly aligned and tightly fastened. By adding support beams, you will enhance the structural integrity of your chicken tractor.
Assembling Side Panels
Next, assemble the side panels of the chicken tractor. These panels will enclose the structure and protect your chickens from the elements and predators. Carefully follow your chosen design plan to align and secure the side panels to the base frame. Ensure that the panels are properly measured and evenly spaced to create a secure and comfortable environment for your chickens.
Securing the Roof
Complete the frame construction by securing the roof of your chicken tractor. The roof will provide shelter and protection from rain and other elements. Depending on your chosen design, you may use a flat or sloped roof. Ensure that the roof is securely attached to the frame, providing a watertight seal. A well-secured roof will prevent leaks and keep your chickens dry and comfortable.
Creating the Enclosure
Installing Wire Mesh Walls
To create a safe enclosure for your chickens, install wire mesh walls on your chicken tractor. The wire mesh will allow for proper ventilation while keeping predators out. Measure and cut the wire mesh to fit the dimensions of your chicken tractor’s side panels. Secure the wire mesh using staples or zip ties, ensuring that there are no gaps or loose ends. This will prevent predators from accessing your chickens while still allowing them to enjoy fresh air and sunlight.
Installing a Door
To provide easy access for feeding, cleaning, and collecting eggs, install a door in your chicken tractor. The door should be sturdy and secure, allowing you to open and close it easily. Consider adding a latch or lock to prevent predators from opening the door. The door should be large enough for you to comfortably enter the chicken tractor while ensuring that your chickens cannot escape.
Options for Ventilation
Proper ventilation is crucial for the health and well-being of your chickens. Consider incorporating additional ventilation options in your chicken tractor design. This can include adding windows or air vents to promote air circulation and reduce moisture buildup. Good ventilation will help prevent respiratory issues and ensure a comfortable environment for your chickens.

Providing Shelter and Protection
Choosing a Roofing Material
When it comes to choosing a roofing material for your chicken tractor, consider durability, affordability, and ease of installation. Popular options include corrugated metal sheets, polycarbonate panels, or even recycled materials such as plastic or fiberglass. Ensure that the roofing material you select is weather-resistant and able to withstand harsh conditions. This will provide your chickens with reliable shelter and protection.
Adding a Durable Floor
To create a clean and comfortable environment for your chickens, add a durable floor to your chicken tractor. Consider using materials such as plywood or plastic flooring, which are easy to clean and maintain. The floor should be smooth and secure, preventing any predators or pests from burrowing underneath. A durable floor will also protect your chickens’ feet from injuries and keep their living space sanitary.
Implementing Predator-proof Measures
Ensuring the safety of your chickens from predators is of utmost importance. Implement predator-proof measures such as burying wire mesh or creating an apron around the chicken tractor’s perimeter. This will deter digging predators from gaining access to your flock. Additionally, consider using secure latches and locks on doors and windows to prevent unauthorized entry. These measures will provide peace of mind and protect your chickens from potential harm.
Adding Feeder and Waterer
Choosing the Right Feeder
Selecting the right feeder is essential for providing your chickens with easy access to their food. Consider the size and design of the feeder to accommodate the number of chickens you have. Look for feeders that are durable, easy to clean, and have adequate capacity to minimize frequent refilling. Providing your chickens with a reliable and accessible feeder will ensure they receive proper nutrition.
Installing a Waterer
In addition to a feeder, installing a waterer is crucial for your chickens’ hydration needs. Choose a waterer that is suitable for the number of chickens you have and easy to clean and refill. Consider options such as gravity-fed waterers or nipple waterers that prevent contamination and spillage. Proper hydration is essential for the overall health and productivity of your chickens.
Ensuring Easy Access
When installing both the feeder and waterer, ensure easy access for both you and your chickens. Place them at a convenient height that allows you to refill without difficulty. Consider mounting the waterer and feeder securely to prevent tipping or spillage. Easy access will save you time and effort during daily maintenance while keeping your chickens well-fed and hydrated.

Creating a Nesting Area
Designing Nesting Boxes
Creating a nesting area is crucial if you plan on raising chickens for egg production. Design nesting boxes that provide a dark, quiet, and comfortable space for your chickens to lay eggs. Consider using materials such as wood or plastic and create separate compartments for each nesting box. It is essential to have one nesting box per three to four hens. This arrangement will promote a stress-free environment and encourage consistent egg-laying.
Ensuring Privacy and Comfort
In addition to designing nesting boxes, ensure privacy and comfort within the nesting area. Place the nesting boxes in a quiet corner of your chicken tractor, away from high traffic areas. Consider adding bedding material, such as straw or wood shavings, to increase comfort and encourage your chickens to use the nesting boxes. Providing privacy and comfort will promote egg production and allow your chickens to lay their eggs in a safe and stress-free environment.
Installing a Roosting Bar
Determining the Right Height
Installing a roosting bar in your chicken tractor is essential for your chickens to rest comfortably. Determine the appropriate height of the roosting bar based on the size and breed of your chickens. Allow enough space for each chicken to perch without overcrowding. It is recommended to place the roosting bar higher than the nesting boxes to discourage chickens from soiling them. Providing a suitable roosting area will promote good health and overall well-being for your flock.
Selecting Suitable Material
When selecting a material for your roosting bar, prioritize comfort and ease of cleaning. Choose a smooth and sturdy material, such as a wooden dowel or PVC pipe, that will be comfortable for your chickens’ feet. Avoid using materials with sharp edges that could cause injuries. Additionally, ensure the roosting bar is securely fastened to the chicken tractor’s frame to prevent accidents or collapses.
Implementing Effective Ventilation
Determining Ventilation Requirements
Proper ventilation is crucial to maintain a healthy and comfortable environment for your chickens. Determine the ventilation requirements based on factors such as the climate in your region, the number of chickens in the tractor, and the size of the structure. Ensure that the vents are strategically placed to promote air circulation without causing drafts. Proper ventilation will prevent the buildup of ammonia and moisture, reducing the risk of respiratory issues in your flock.
Installing Vents
To implement effective ventilation, install vents in your chicken tractor. These vents can be in the form of windows, vents, or openings that allow fresh air to circulate. Consider using wire mesh or plastic covers to prevent predators from entering through the vents. Properly sized and positioned vents will maintain optimal air quality and temperature for your chickens.
Finishing Touches and Maintenance
Applying Protective Coatings
To prolong the lifespan of your chicken tractor, consider applying protective coatings to the exterior surfaces. These coatings can include weatherproof paints or stains specially designed for outdoor use. Applying a protective coating will help prevent damage from UV rays, moisture, and other environmental factors. Regularly inspect and touch up the coating as needed to ensure its effectiveness.
Regular Cleaning and Maintenance
Maintaining a clean and sanitary chicken tractor is crucial for the health and well-being of your chickens. Establish a regular cleaning schedule to remove droppings, replace bedding material, and disinfect the interior surfaces. Regularly inspect the structure for any signs of damage or wear and address them promptly. Dedicate time to performing routine maintenance tasks, such as oiling hinges and tightening screws. By staying proactive in maintenance, you will extend the life of your chicken tractor and provide your chickens with a safe and comfortable living space.
In conclusion, building a DIY chicken tractor for pastured poultry requires careful consideration and planning. By following the steps outlined in this article, you can construct a sturdy and functional chicken tractor that will provide your chickens with the space, shelter, and protection they need while allowing them to graze and forage freely. Remember to evaluate size, mobility, and materials during the design phase, prepare the area properly, construct a solid frame and enclosure, provide shelter and protection, install feeder and waterer, create a nesting area, add a roosting bar, implement effective ventilation, and finish with protective coatings and regular maintenance. With your DIY chicken tractor in place, you can enjoy the benefits of raising happy and healthy chickens in your backyard.