In this article, we will explore the ways in which you can successfully acclimate your chickens to different types of waterers and feeders. Whether you’re a seasoned chicken owner or just starting out, it’s crucial to ensure that your feathered friends are comfortable and familiar with their equipment. By following a few simple steps, you can help ease their transition, maintain their health, and create a stress-free environment for your chickens. So, let’s dive in and discover the best practices for introducing new waterers and feeders to these delightful creatures.
Understanding the Need for Acclimation
The Importance of Acclimating Chickens to Waterers and Feeders
When it comes to raising chickens, ensuring their health and productivity is essential. One often overlooked aspect of chicken care is acclimating them to different types of waterers and feeders. Acclimation refers to the process of gradually introducing chickens to new equipment or environments, allowing them to adapt and become familiar with the changes. Acclimating chickens to waterers and feeders is crucial to their overall well-being and can significantly impact their health and egg production.
Factors Affecting Chicken Acclimation
Several factors can influence how well chickens acclimate to new waterers and feeders. Firstly, the age of the chickens plays a role. Younger chicks may adapt more quickly, while older chickens may take longer to adjust to any changes in their routine. Additionally, the previous experiences of the chickens can affect their acclimation process. Chickens that have not been exposed to a variety of waterers and feeders may require more time to become comfortable with new equipment. Lastly, the type of waterer or feeder being introduced can also impact how well the chickens adjust. Different designs and features may require varying levels of acclimation.
The Role of Proper Acclimation in Chicken Health and Productivity
Proper acclimation of chickens to waterers and feeders is crucial for their overall health and productivity. When chickens are accustomed to their equipment, they are more likely to consume adequate amounts of water and feed, which are essential for proper development and egg production. Acclimating chickens can also reduce stress levels that may arise from sudden changes in their environment. By gradually introducing new waterers and feeders, chicken owners can help ensure a smooth transition and promote the overall well-being of their flock.
Introducing New Waterers to Chickens
Gradual Transition from Old to New Waterer
When introducing a new waterer to your chickens, a gradual transition is essential. Start by placing the new waterer next to the old one so that the chickens have access to both. This allows them to familiarize themselves with the new equipment while still having the security of the familiar one. Over time, gradually remove the old waterer until the new one becomes the primary source of water.
Choosing the Right Location
Selecting the proper location for the waterer is crucial for successful acclimation. Place the waterer in an easily accessible and well-ventilated area, away from direct sunlight or extreme temperatures. Chickens prefer to drink in a calm and quiet environment, so avoid placing the waterer near busy or noisy areas. Additionally, consider the proximity to the coop or run to ensure convenient access for the chickens.
Providing Familiarity through Visual and Auditory Cues
To help chickens acclimate to a new waterer, provide visual and auditory cues that create a sense of familiarity. Place a reflective object, such as a small mirror, near the waterer to mimic the appearance of water. Additionally, playing soft, gentle sounds like dripping water can attract chickens towards the waterer. These cues can help in drawing the chickens’ attention and encouraging them to explore the new equipment.
Ensuring Water Quality and Hygiene
Maintaining water quality and hygiene is critical when acclimating chickens to new waterers. Ensure the water is clean, free from contaminants, and refreshed regularly to prevent bacterial growth. Regularly check the waterer for dirt, algae, or debris and clean it thoroughly as needed. Providing clean and freshwater will promote both the long-term usage of the waterer and the overall health of the chickens.
Monitoring and Encouraging Usage
During the acclimation process, closely monitor the chickens’ water intake to ensure they are adapting to the new waterer. Observe their drinking habits and check for any signs of dehydration, such as lethargy or decreased egg production. Encourage usage by occasionally dipping the chickens’ beaks into the water or placing small treats near the waterer to attract their attention. Patience is key during the acclimation process, as chickens may take some time to feel comfortable using the new waterer.
Acclimating Chickens to Different Feeder Types
Introducing New Feeder to Established Flock
Introducing a new feeder to an established flock requires a gradual approach. Initially, place the new feeder alongside the existing one, allowing the chickens to become familiar with the new equipment while still having access to their regular feed source. As the chickens start to use the new feeder, gradually remove the old one to encourage a complete transition.
Transitioning from One Feeder Type to Another
If you are transitioning from one feeder type to another, it is important to consider the differences in design and functionality. Chickens may need time to adjust to the new feeding mechanism or layout. Similar to introducing a new feeder, gradually introduce the new design while still providing access to the old one. Over time, remove the old feeder, allowing the chickens to fully adapt to the new feeding system.
Determining Optimal Feeder Placement
Proper placement of the feeder can greatly influence the acclimation process. Choose a location that is easily accessible to all chickens and provides enough space to accommodate their flock size. Avoid placing feeders in areas prone to high humidity or pest infestations, as these factors can negatively affect feed quality. Additionally, ensure the feeder is positioned at an appropriate height, allowing easy access for chickens without straining or spilling feed.
Monitoring Feed Intake and Adjusting as Needed
Regularly monitor the chickens’ feed intake to ensure they are acclimating well to the new feeder. Observe their behavior during feeding times and ensure that all chickens have equal access to feed. If necessary, adjust the feeder’s height or location to accommodate the chickens’ preferences and optimize their feeding experience. It is crucial to provide a sufficient amount of feed and ensure that all chickens receive an appropriate share.
Considerations for Different Feeder Designs
Different feeder designs offer varying benefits and considerations. Gravity-feeders, such as tube or trough feeders, rely on the chickens’ pecking behavior to dispense feed. Pan feeders and step-on feeders, on the other hand, provide a broader feeding area. Consider the specific needs and behaviors of your flock when selecting the feeder design. Some chickens may prefer a more enclosed feeder, while others may thrive with an open trough. Understanding the requirements of your flock will help you choose the most suitable feeder design for successful acclimation.
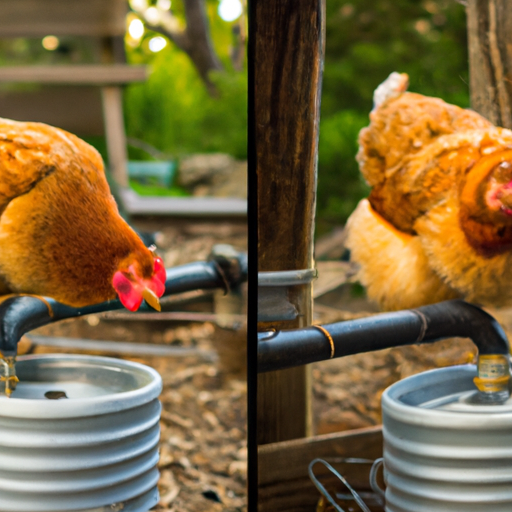
Training Chickens on Automatic Watering Systems
Understanding Automatic Waterer Functionality
Automatic watering systems provide a convenient and efficient way to supply water to chickens. These systems rely on sensors, timers, or pressure to automatically dispense water. Understanding how automatic waterers function is crucial before introducing them to your flock. Familiarize yourself with the specific features and adjustments of the system, such as water pressure settings and water level controls.
Getting Chickens Familiar with the System
Before fully transitioning to automatic waterers, allow the chickens to become familiar with the system. Start by placing the new waterer alongside the existing one, gradually reducing the use of the old water source. Over time, encourage the chickens to use the automatic waterer by adjusting the water pressure to ensure a steady flow. The sound and motion associated with the automatic waterer may initially startle the chickens, so patience and persistence are important during this acclimation process.
Gradually Transitioning from Manual to Automatic Waterers
When transitioning from manual to automatic waterers, it is essential to do so gradually. Begin by using the automatic waterer as a supplemental source alongside the existing manual waterer. This allows the chickens to become accustomed to the new system while still having access to the familiar manual waterer. As the chickens start using the automatic waterer more frequently, slowly decrease the availability of the manual waterer until it is no longer necessary.
Ensuring Easy Access and Preventing Obstructions
Proper installation and positioning of automatic waterers are essential to ensure easy access and prevent obstructions. Ensure the waterers are at an appropriate height for the chickens, allowing them to reach the water easily without straining. Regularly check the waterer for any blockages, such as debris or ice, which can impede the water flow. Adequate space around the waterer is also important to prevent overcrowding and ensure all chickens have access.
Regular Maintenance and Checking for Malfunctions
Regular maintenance and monitoring are necessary to ensure the proper functioning of automatic waterers. Inspect the system regularly for any signs of damage or malfunctions such as leaks or clogs. Clean the waterer periodically to remove any buildup or bacteria that could potentially harm the chickens. By taking proactive measures with maintenance, you can ensure the longevity and efficiency of the automatic waterer system.
Encouraging Chickens to Use Nipple Waterers
Benefits of Nipple Waterers
Nipple waterers offer several benefits for chickens and their owners. Unlike traditional waterers, nipple waterers prevent water contamination as the water is not directly exposed to the chickens’ beaks or feet, reducing the risk of bacterial infections. Nipple waterers also promote water conservation, as chickens can drink directly from the nipple, minimizing wastage. Additionally, these waterers are easy to install and maintain, making them a convenient choice for chicken owners.
Introducing Nipple Waterers to Chickens
Introducing nipple waterers to chickens requires a gradual approach. Initially, place shallow dishes containing water alongside the nipple waterer to attract the chickens’ attention. As they become curious and explore the dishes, adjust the height of the waterer to encourage them to interact with the nipples. Over time, remove the dishes and allow the chickens to drink solely from the nipple waterer. Be patient and observe their progress, ensuring they are adapting well to this new water source.
Adjusting Nipple Height and Placement
Proper adjustment of nipple height is essential for successful acclimation. The nipples should be positioned at a height where chickens can comfortably reach them without having to strain or stretch excessively. As the chickens grow, periodically check and adjust the nipple height accordingly to ensure easy access. Additionally, consider the number of nipples available to accommodate the size of the flock and avoid overcrowding.
Promoting Early Interactions with Nipples
Encouraging early interactions with the nipples is key to successful acclimation. Gently tap or touch the nipples to simulate droplets of water, piquing the chickens’ curiosity and encouraging them to investigate further. Additionally, ensure that the nipples are clean and free from any debris that could hinder water flow, as clogged nipples may deter chickens from using them. By creating positive associations with the nipples, you can motivate chickens to use this new waterer consistently.
Regular Cleaning and Inspection
Regular cleaning and inspection of nipple waterers are necessary to maintain their functionality and promote chicken health. Remove any buildup or debris from the nipples using a small brush or toothpick. Flush the waterer periodically to prevent blockages and ensure a clean water supply. It is important to monitor the condition of the rubber or metal nipples and replace them as needed to prevent leaks or wear that could compromise the waterer’s efficiency.
Transitioning Chickens to Open Trough Waterers
Advantages and Considerations of Open Trough Waterers
Open trough waterers offer several advantages for chickens and their caretakers. They provide a large water surface area, allowing multiple chickens to drink simultaneously. The open design also promotes easy access and visibility, making it easier to monitor water levels and cleanliness. However, it is important to ensure that water quality is maintained, as open trough waterers are more susceptible to contamination from dirt and droppings compared to other waterer types.
Gradual Introduction to Open Trough Waterers
When transitioning chickens to open trough waterers, gradual introduction is crucial. Initially, place shallow dishes containing water near the trough to attract the chickens. As they become comfortable drinking from the dishes, shift the water source to the trough itself. Monitor the chickens closely during the transition, ensuring they are adapting well and not experiencing any difficulties accessing the water.
Maintaining Cleanliness and Water Quality
To maintain optimal water quality in open trough waterers, regular cleaning and maintenance are necessary. Remove any debris or droppings daily, as these can contaminate the water and pose health risks to the flock. Regularly change the water, especially during hot weather or when the water becomes soiled. Proper hygiene practices will help prevent waterborne diseases and ensure the chickens have access to clean and fresh water at all times.
Ensuring Sufficient Space and Access
Providing sufficient space and access to open trough waterers is essential for the well-being of the chickens. Place the trough in an area where all chickens can easily reach it without any physical barriers or overcrowding. Consider the size of the flock and adjust the number and length of the troughs accordingly. Having multiple troughs or strategically positioning them within the coop or run will ensure that all chickens have easy access to water.
Monitoring Usage Patterns and Troubleshooting
During the adaptation process to open trough waterers, monitor the chickens’ usage patterns to identify any issues or challenges they may be facing. Observe their behavior during feeding times and ensure that all chickens have equal access to the troughs. In some cases, chickens may spill or waste water, leading to wet bedding or contaminated drinking areas. Address any such issues promptly by adjusting the height or positioning of the troughs to prevent unnecessary wastage and encourage efficient water consumption.
Addressing Challenges with Gravity Feeders
Understanding Gravity Feeder Mechanics
Gravity feeders operate based on the principle of gravity, where feed naturally flows downward into a feeding tray as chickens peck at it. Understanding the mechanics of gravity feeders is key to effectively acclimating chickens to this type of feeder. Familiarize yourself with the specific features and adjustments of the gravity feeder you are using, such as feed flow control mechanisms and tray positioning.
Training Chickens to Use Gravity Feeders
Training chickens to use gravity feeders requires patience and persistence. Initially, scatter some feed on the feeding tray to attract the chickens’ attention and encourage them to explore. As they peck at the feed, they will learn to associate the tray with a food source. Over time, they will develop the necessary pecking behavior to activate the gravity-fed flow and obtain their feed. Regularly monitor their progress and provide positive reinforcement to reinforce this feeding behavior.
Optimizing Feeder Placement and Accessibility
Proper placement and accessibility of gravity feeders are important for effective acclimation. Position the feeder in an area that is easily accessible and where chickens spend most of their time. Ensure the feeder is at an appropriate height, allowing the chickens to comfortably peck at the feed without straining. Additionally, prevent overcrowding and place the feeder away from high traffic areas to promote a calm feeding environment.
Managing Feed Flow and Preventing Blockages
Maintaining an optimal feed flow is crucial for the functionality of gravity feeders. Fine-tune the feed flow control mechanisms to ensure a steady and consistent feed supply. Adjustments may be necessary depending on the size and type of feed being used. Regularly inspect the feeder for any blockages or buildup of feed debris that could impede the flow. Clear any obstructions promptly to prevent feed wastage and ensure a continuous supply of feed.
Regular Cleaning and Maintenance
Regular cleaning and maintenance are essential to keep gravity feeders in good working condition. Remove any old or spoiled feed from the tray to prevent contamination and reduce the risk of pests. Ensure the feeding tray is clean and free from any mold or bacterial growth. Additionally, inspect the feed flow control mechanisms and other parts of the feeder for any signs of damage or wear. Regular maintenance will help extend the lifespan of the gravity feeder and ensure optimal feeding for the chickens.
Adapting Chickens to Pan Feeders
Benefits and Considerations of Pan Feeders
Pan feeders offer several benefits for chickens and their caretakers. They provide a larger feeding area, allowing multiple chickens to access feed simultaneously. The open design also allows for easy monitoring and cleaning. However, it is important to consider potential wastage and feed distribution issues that may arise with pan feeders. Chickens can sometimes flick or scratch feed out of the pan, leading to wastage and possible contamination.
Introducing Pan Feeders to Chickens
Introducing pan feeders to chickens requires a gradual approach. Initially, place shallow dishes containing feed near the pan feeder to attract the chickens. As they become comfortable eating from the dishes, begin shifting the feed source to the pan feeder. Monitor the chickens closely during the transition to ensure they are adapting well and not experiencing any difficulties accessing the feed.
Ensuring Proper Pan Height and Level
Proper pan height and level are crucial for successful adaptation to pan feeders. The pan should be positioned at a height that allows all chickens to comfortably reach the feed without straining. Ensure the pan is level to prevent feed accumulation on one side, which may discourage chickens from consuming feed from the entirety of the pan. Adjust the pan’s height and level as needed to promote optimal feeding behavior.
Monitoring Feed Distribution and Wastage
Regularly monitor feed distribution and wastage when using pan feeders. Observe the chickens’ eating behavior and ensure that all chickens have equal access to feed. If significant amounts of feed are being flicked or scratched out of the pan, consider using feed grills or other accessories that help contain the feed and reduce wastage. Address any distribution or wastage issues promptly to ensure efficient feed consumption and minimize feed costs.
Cleaning and Adjusting as Needed
Pan feeders require regular cleaning to maintain feed hygiene and prevent contamination. Remove any remaining feed or debris from the pan and clean it thoroughly at regular intervals. Inspect the pan for any signs of wear or damage that could impact its functionality. Additionally, adjust the pan’s height or level if necessary to accommodate the chickens’ growth and ensure easy access to feed for all flock members.
Guiding Chickens to Step-On Feeders
Understanding Step-On Feeder Functionality
Step-on feeders operate based on the chickens’ stepping motion, which triggers the release of a small amount of feed. Understanding the functionality of step-on feeders is crucial for acclimating chickens to this type of feeder. Familiarize yourself with the specific features and adjustments of the step-on feeder you are using, such as feed flow control mechanisms or sensitivity settings.
Training Chickens to Use Step-On Feeders
Training chickens to use step-on feeders requires gentle guidance and positive reinforcement. Place a small amount of feed on the feeding tray and observe as the chickens peck at it. Encourage them to step on the feeder by placing treats or tempting morsels near it. As they start stepping on the feeder, the motion should trigger the release of additional feed. Reinforce this behavior by providing treats directly on or near the feeder, reinforcing the association between the stepping motion and the reward of more feed.
Setting up Step-On Feeders Correctly
Proper setup of step-on feeders is important for successful acclimation. Ensure the feeder is positioned securely on a stable surface to prevent tipping or displacement when the chickens interact with it. Adjust the sensitivity settings to a level that suits your flock’s size and behavior, allowing them to trigger the release of feed comfortably. Regularly inspect the feeder for any signs of damage or wear and make any necessary adjustments or replacements to maintain its functionality.
Monitoring Supplemental Feed and Avian Health
Step-on feeders are often used as supplemental feeders for treats or additional nutrition. When incorporating step-on feeders into your feeding routine, closely monitor the amount of feed being consumed by the chickens. Adjust the amount of supplemental feed provided based on their response and overall dietary needs. Additionally, regularly evaluate the chickens’ overall health and well-being, as changes in behavior or feed intake may indicate underlying health issues.
Maintenance and Preventing Pest Infestation
Regular maintenance of step-on feeders is crucial to prevent pests and maintain their functionality. Regularly clean the feeding tray and remove any remaining feed to discourage pest infestation. Inspect the feeder for any signs of damage or wear, particularly in the step-on mechanism, and address any issues promptly. By maintaining clean and functional step-on feeders, you can ensure an effective feeding system for your chickens and reduce the risk of pest-related problems.
Introducing Chickens to Grit and Shell Dispensers
Role of Grit and Shell Dispensers in Poultry Diets
Grit and shell dispensers play an important role in providing essential minerals and aiding digestion for chickens. Grit helps grind food in the chicken’s gizzard, aiding the breakdown of feed. On the other hand, oyster shells or eggshells provide a calcium source that helps strengthen eggshells and prevent calcium deficiencies in laying hens. Introducing grit and shell dispensers to chickens is essential for their overall health and well-being.
Gradual Introduction of Grit and Shell Dispensers
Gradually introduce grit and shell dispensers to chickens to ensure they understand their purpose and associated feed. Initially, scatter a small amount of grit or crushed eggshells near the dispensers, allowing the chickens to explore and peck at them. Over time, move the grit or shell source into the dispensers to encourage them to use the designated area for these specific feed types. Monitor the chickens closely during the transition to ensure they are adapting well to the dispensers.
Choosing the Right Dispenser Type and Size
When selecting grit and shell dispensers for your flock, consider the size and preferences of your chickens. Dispensers should be of an appropriate size to accommodate the needs of your flock, providing enough space for all chickens to access the grit or shells simultaneously. Choose dispenser types that prevent contamination and wastage, ensuring that the grit or shells remain clean and easily accessible.
Ensuring Easy Access and Sufficient Supply
Proper accessibility and a sufficient supply of grit and shells are essential for your chickens’ health. Position the dispensers in an area that all chickens can easily reach without crowding or competition. Monitor the dispensers regularly and replenish the grit or shells as needed to ensure a continuous supply. Adequate access to these essential feed types will help support your chickens’ digestion and overall well-being.
Cleaning and Refilling Dispensers
Regular cleaning and maintenance of grit and shell dispensers are necessary to prevent contamination and maintain optimal feeding conditions. Clean the dispensers periodically, removing any debris or buildup that may have accumulated. This will help prevent bacterial growth and ensure a clean feeding environment. Along with regular cleaning, regularly inspect the dispensers for any signs of damage and replace them as needed to ensure the continued effectiveness of the grit and shell feeding system.